
Many of us struggle with a fast, efficient, and accurate first shot. One of the greatest problems I see with students seems to be the ability to drive the gun straight to the target. The presentation of delivering the gun to the target tends to get muddled with something other than a smooth, straight-like-it’s-on-a-rail presentation.
The two most common errors seem to be “fly fishing” which is a muzzle high delivery, and “bowling” which is a muzzle low delivery. While not a death roll to shooting, “fly fishing” and “bowling” does take effort to correct on the delivery. The draw tends to be smoother if the gun rotates straight up from the holster, and into a “high ready” position. This “high ready” position should include getting the gun as high as possible between the eye and the target. Positioning the gun too low at the high ready causes the shooter to have to not only drive the gun straight out, but also up. This problem also takes time, and conscious effort on the presentation.
The shooter, or coach, should also pay attention that the slide of the pistol being in an orientation that is parallel to the ground. Making this simple change each time helps the shooter correct these presentation problems.
This simple change in presentation will make the shots both quicker and place them more accurately if the proper trigger control is applied.
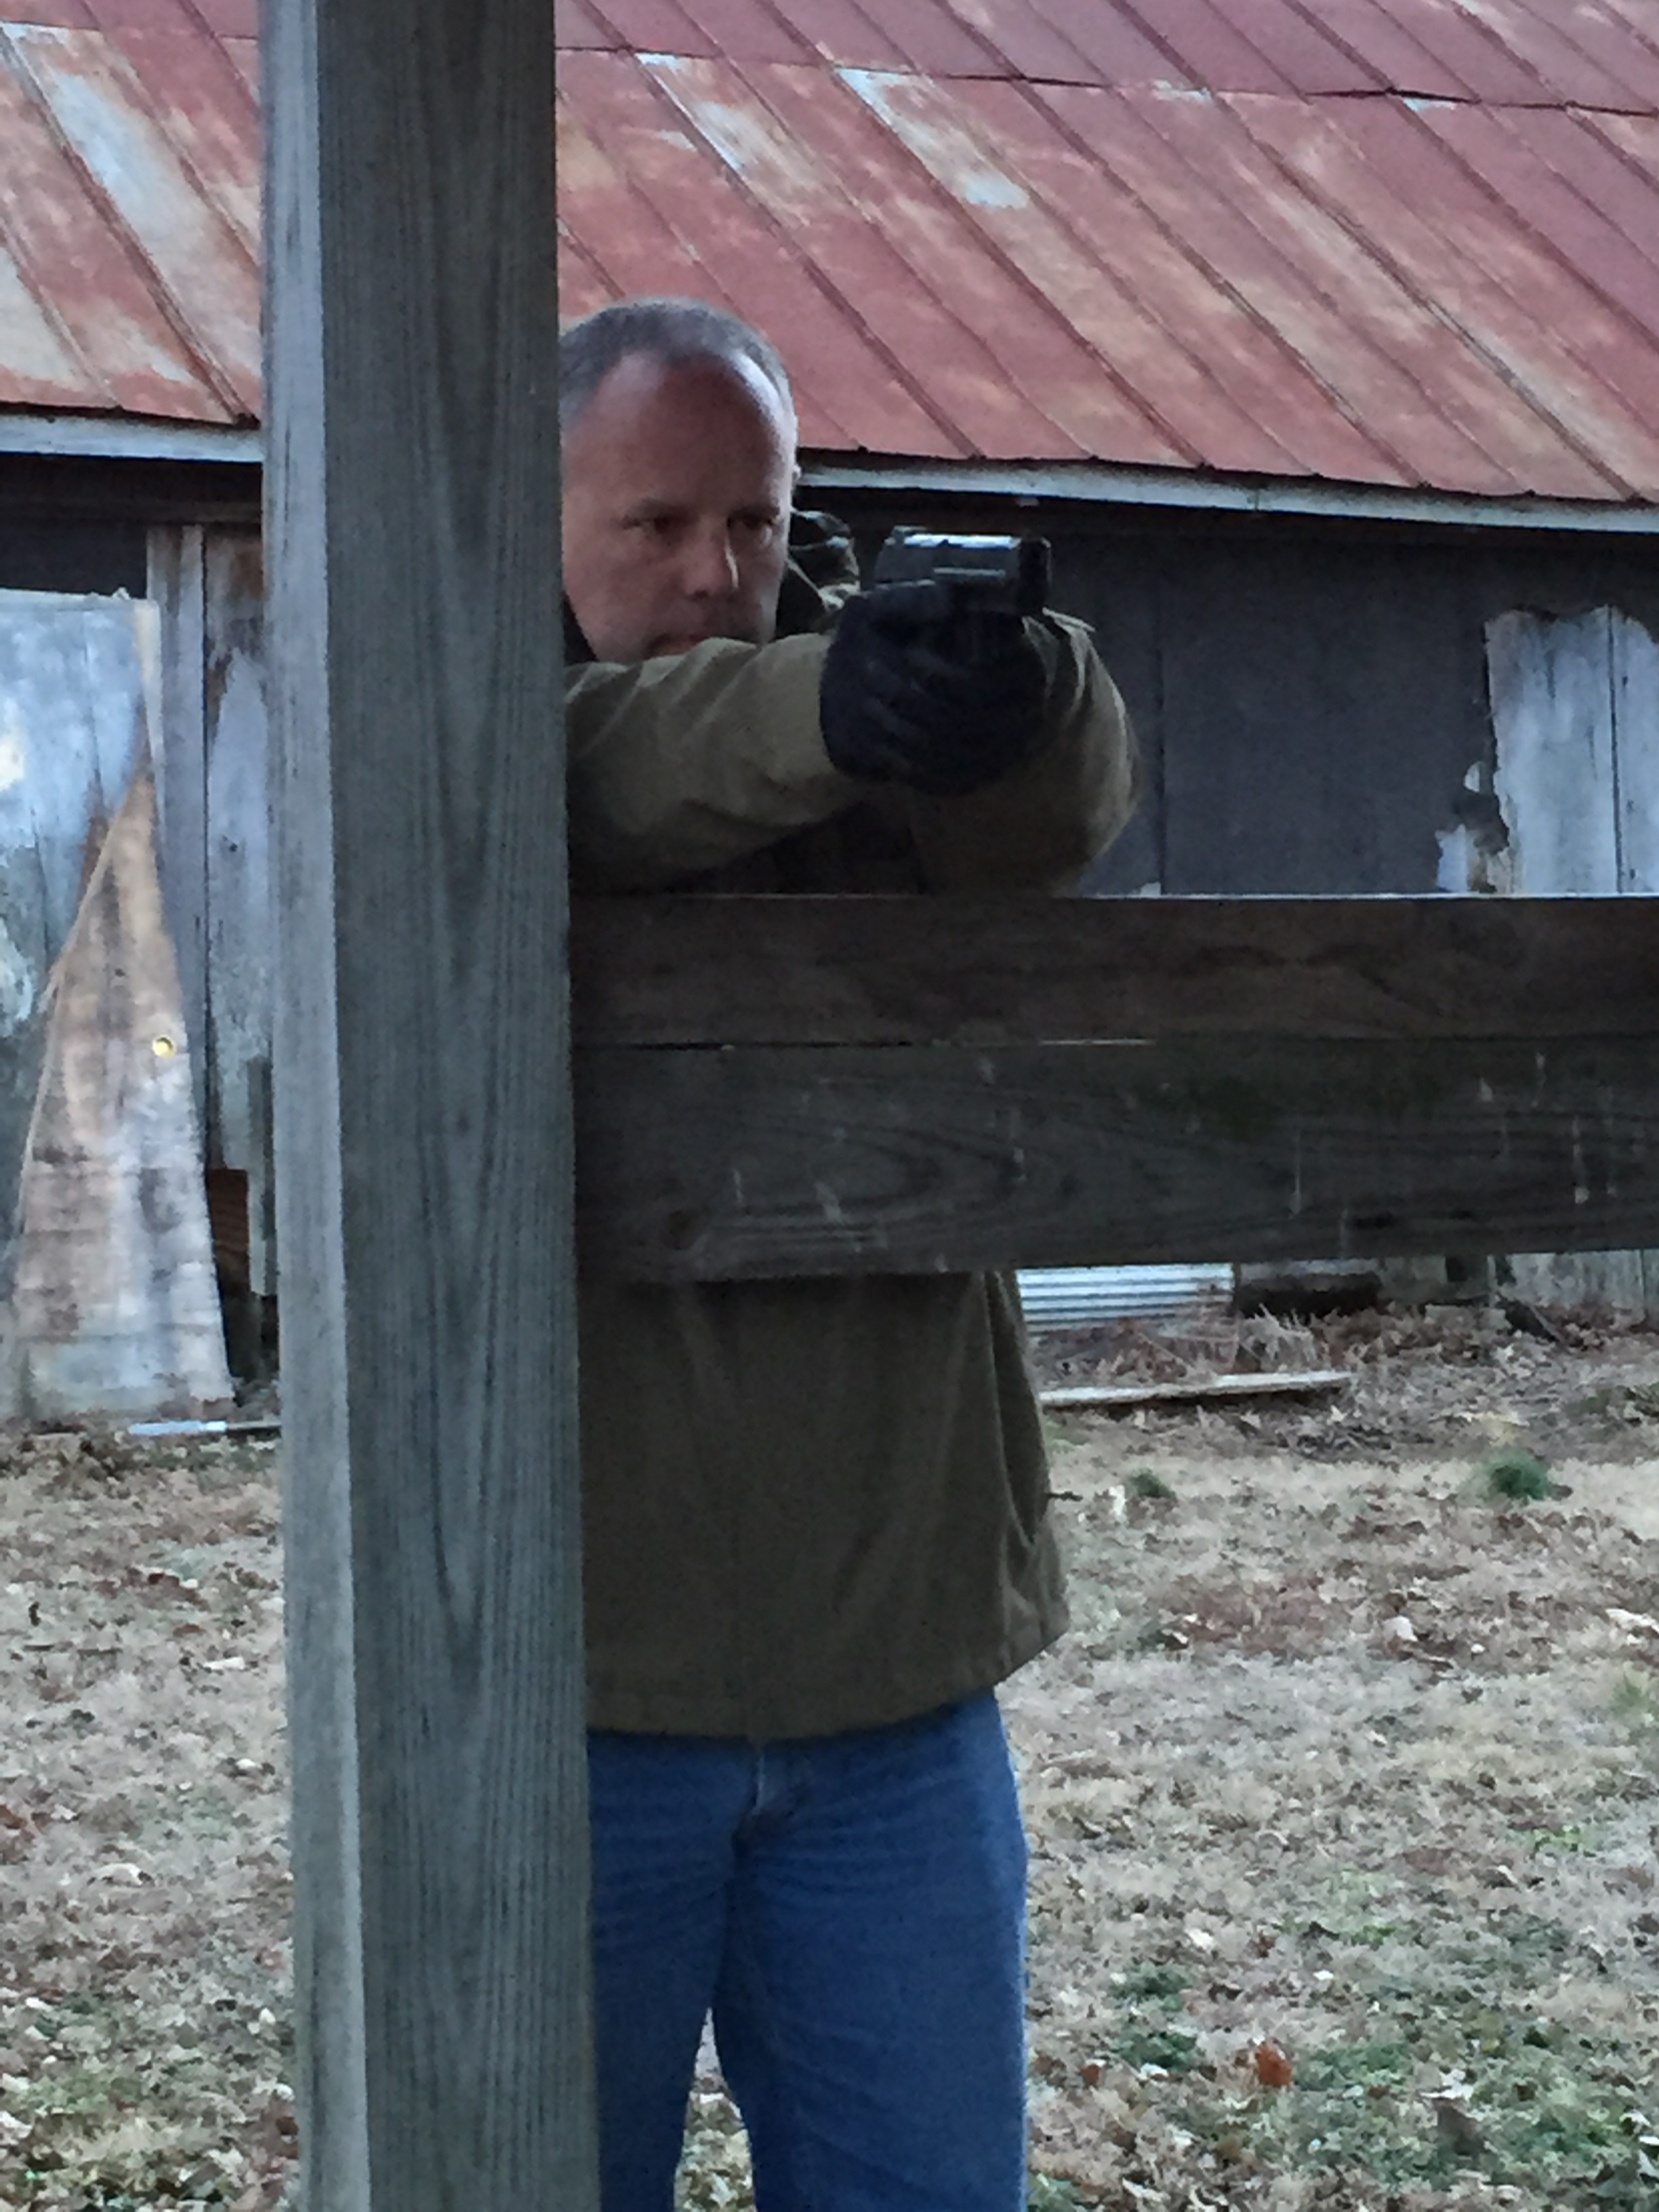
For those who struggle with driving the gun straight out, or have students who do, the window drill is a great solution. It’s called a window drill as the basis is to teach the student that they are driving the gun out and forward through a narrow window. The student isn’t allowed to touch the sides of the window on the presentation. A shooter or coach can cut a hole in a cardboard backer to facilitate this. Or simply, find a chest level barricade. Once you have decided what you want to use, have the shooter stand about one foot behind the “window”. Have the shooter draw pistol to a high ready position and practice driving the gun straight out to the target. Once the shooter feels good about the presentation, have them work back to the holster without touching the “window”.
Working repetitions on the Window Drill will pay dividends to driving the gun hard to the target.
Bowling is a huge problem for me. Any good vids you’d recommend on the window drill? Lots of confusing garbage out there.
Great training idea.
What I like is that it’s not complicated. As you and I know most police officersand deputies aren’t gun slingers. The only practice they do is the day of qualifications. I’m always telling deputies they need to practice especially the draw and dry fire.
I tell them if they do this they don’t have to be on the range that long. I like to practice and try new training tips.
Great post
I personally try to make the line between gun in holster and front sight on target as straight as possible avoiding the L-shaped trajectory that comes with the method you´re advocating in the article, as demonstrated by Ron Avery in this famous clip: https://www.youtube.com/watch?v=BMSlCyc-SQQ
I find it makes my draws smoother and faster.
What is there to gain by starting with high ready and then pushing out compared to straightening the line?