
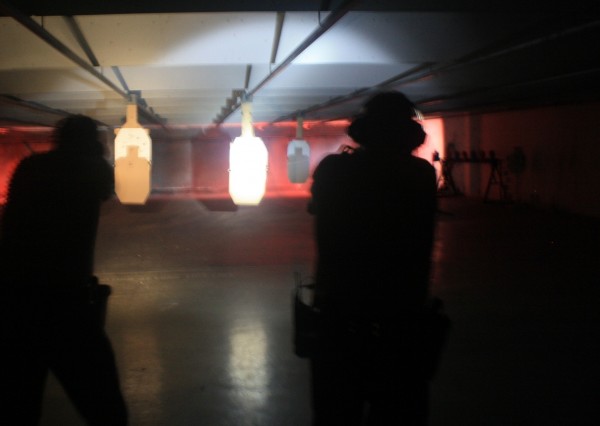
Co-workers on an indoor, square range working flashlight techniques on two dimensional targets.
Killing all of the lights on an indoor range and working various combinations of handgun / flashlight techniques is helpful in building a foundation for working in low light. It is the first step in low light training. There should be a progression from static training in handling the light, then the light with a pistol, carbine or shotgun together on up through reduced light force on force evolutions. One of the events should include a comparison of what you can see and what your equipment allows you to see compared to what your co-workers experienced.
In conjunction with pistol mounted light training, we ran an exercise allowing my co-workers to a) see what they could see and b) see what their equipment – as they carried it – allowed them to see and compare it to their peers. This took place on our indoor range, which allowed it to be done regardless of the time of day.
With the assistance of a dispatcher, a local high school theater department, and a local mall along with the Goodwill donation bag the “how” was overcome. The people and organizations lent mannequins to us and we dressed them with clothes bound for Goodwill. The “weapons” came from BB guns along with a box cutter & knife out of my tool chest.
Mannequin #1 is a mid-thigh to neck female model. She was dressed in a t-shirt and shorts. A stainless steel folding knife was placed in the left pocket with the clip outside of the pocket, clearly visible. Inside the shorts on the right hip was a dark colored BB gun.
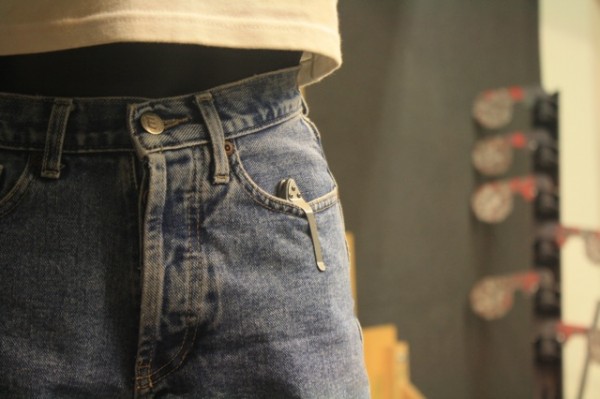
The clip and a small part of the handle – just enough stainless steel.
Mannequin #2 was a nearly life size model. Dressed in work trousers and an un-tucked long sleeve shirt, there was an opened box cutter with the blade in view in the hand nearest the deputy. At the mannequin’s feet was another BB gun.
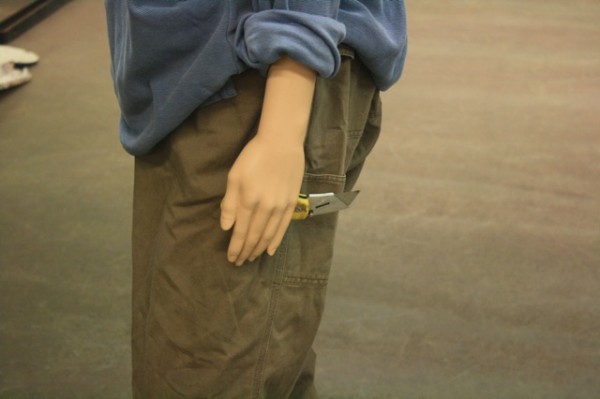
Open box-cutter, with a once high-visibility yellow handle in plain view.
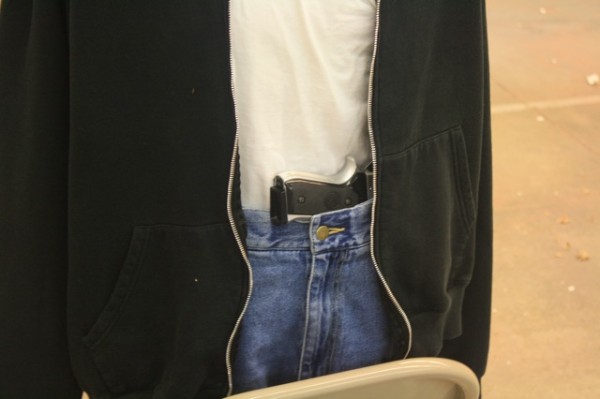
And the handgun’s initial placement. Not the most obvious of the weapons I’ll admit.
And to see how broad their view was, we left the BB gun on the ground in front of the mannequin.
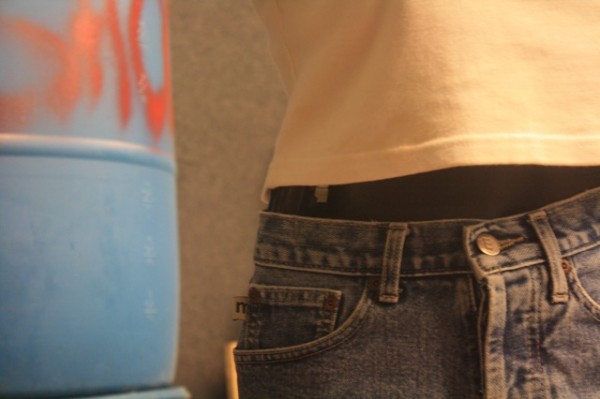
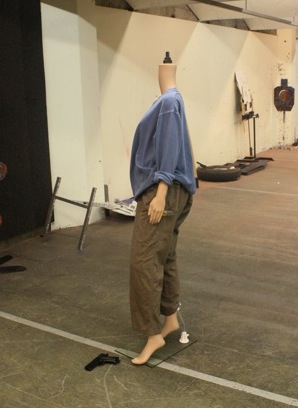
Mannequin #3 was a mid thigh to neck model on a pedestal. It was dressed in jean shorts and t-shirt with a hoodie over those. In the waistband was the butt – grip panels and frame – of a stainless Beretta 92F-look a like and magazine.
This was the 15 yard mannequins with the frame, grip and magazine base pad in-view.
The initial plan was to set the mannequins at 10, 15 and 20 yards. However, once they were set up and we began checking them with different lights from differing angles, we found those distances could prevent some from being able to identify the threats.
The distance was then reset at 5, 10 and 15 yards. This is what it looked like with the lights on:
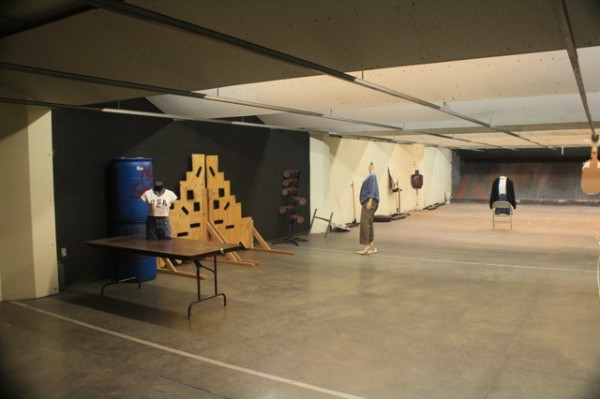
All three mannequins fully dressed with props at distance – with the lights on.
Next – What happened and what was learned once we turned the lights down?